

The first few weeks decide the success of your grow. Keep the temperature within an ideal range, maintain suitable relative humidity, use an 18/6 hour photoperiod and keep root moisture light to avoid overwatering, and you will have solved most of the problems that affect beginners. According to GrowithJane, a healthy seedling needs a suitable initial light intensity and those temperature and humidity ranges to develop a strong root system before any transplanting.
Before getting into the week-by-week schedule, here are the priority actions:
- Germinate in damp paper, in a germinator or directly in light substrate.
- Keep the root zone slightly moist, never waterlogged.
- Use soft light (dimmed LED or fluorescent) at a prudent distance.
- Avoid transplanting until the roots hold the substrate firmly.
- Don’t start nutrients during the first two weeks if the substrate already contains them.
| Parameter | Week 1 (seedling) | Week 2–3 | Week 4+ (vegetative) |
|---|---|---|---|
| Temperature | 22–26 °C | 22–26 °C | 20–28 °C |
| Relative humidity | 65–75 % | 60–70 % | 50–60 % |
| PPFD (µmol/m²/s) | 100–200 | 100–300 | 100–300 |
| Photoperiod | 18/6 h | 18/6 h | 18/6 h (indoor) |
| Water pH (soil) | 6,0–7,0 | 6,0–7,0 | 6,0–7,0 |
Pro tip: Place a digital hygrometer at the height of the plant canopy, not on the wall of the room. The real reading next to the leaves can differ by 10–15 points from the general ambient reading, and that difference matters for seedlings.
Which seeds to choose and how to prepare everything before germinating?
The most important decision you make before germinating is not the substrate or the light: it is the genetics. For a beginner, feminised autoflowering seeds are the most straightforward option. They flower automatically in 8–12 weeks in total without depending on the photoperiod, which means you don’t need to change the light cycle to start flowering. Feminised photoperiod seeds, on the other hand, give you more control over the final size of the plant because you can extend the vegetative phase at will, but they require a switch to 12/12 hours to flower and a total cycle of 14–20 weeks.
For a first indoor grow with limited space, autoflowering plants win on practicality. If you have more experience or want bigger plants with higher potential yield, photoperiod plants are the natural choice. You can review the differences in detail in the Bluedoggenetics guide to feminised vs regular seeds.
Preparations before germinating:
- Seed storage: keep ungerminated seeds in a cool, dark, dry place. Check Bluedoggenetics’ guide to seed storage to maximise viability.
Revista THC recommends using mycorrhiza-based root promoters from the start, as they improve nutrient uptake and reduce stress during the seedling stage. A mycorrhizal inoculant mixed into the substrate before planting is one of those small investments with a big return.
Germination step by step: methods and signs of success (day 1–7)
There are three proven germination methods. Each has its ideal moment.
-
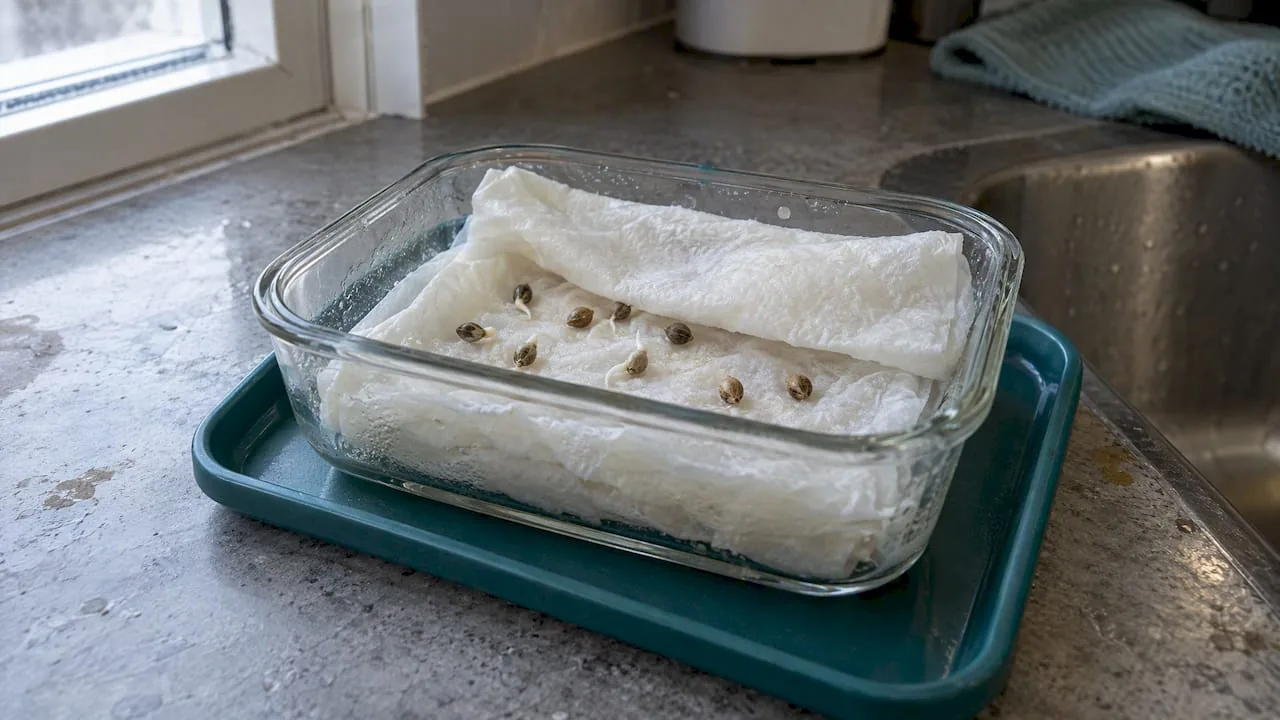
Damp paper (the most popular method for beginners): place the seed between two layers of damp kitchen paper inside a covered plate. Keep it at 22–25 °C in darkness. The taproot usually appears within 24–72 hours. Transplant when the root measures 1–2 cm, taking care not to touch it with your fingers.
-
Seed germinator: foam or peat germinators keep humidity constant and reduce the risk of handling. They are ideal if you germinate several seeds at once or want a more controlled environment. The guide to Bluedoggenetics germinators explains in detail how to set up the optimal environment.
-
Planting directly in substrate: place the seed 0.5–1 cm deep with the tip facing down. Moisten the substrate without waterlogging it. This method removes the risk of damaging the root when transplanting, but you can’t check progress visually.
Day-by-day schedule (days 1–7):
- Day 1: moisten the germination medium or substrate. Place the seed and cover it. Target temperature: 22–25 °C.
- Day 2–3: the seed absorbs water and the shell opens. Do not move it or check it too often; temperature swings delay germination.
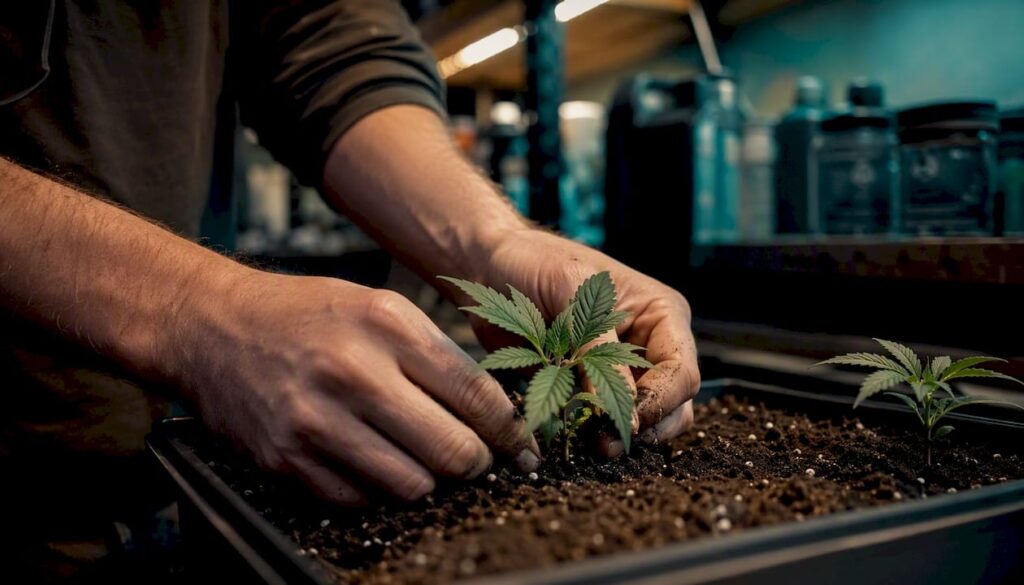
- Day 3–5: the taproot appears. If you use damp paper, transplant now with gentle tweezers. If you sow directly in substrate, keep the surface moist.
- Day 5–6: the cotyledons (the first two rounded “leaves”) push towards the surface. Sign of success: upright stem, open cotyledons and an even green colour.
- Day 7: the cotyledons are fully open. Start the light cycle (18/6) at low intensity.
Signs of a problem and quick fixes:
- Taproot doesn’t appear in 5 days: the seed may be too cold or too dry. Raise the temperature to 25 °C and check the moisture of the paper.
- Thin, drooping stem (damping-off): excess humidity and high temperature favour fungi. Reduce the humidity, improve ventilation and apply a gentle copper-based fungicide if the problem persists.
- Yellow cotyledons: exposure to light that is too intense too soon. Move the light source further away or reduce the power.
For a complete visual guide to the process, see Bluedoggenetics’ step-by-step germination guide.
How to care for your seedling in weeks 1–3: watering, light and when to transplant
The seedling stage is the most delicate of the cycle. The plant has a small root system and a limited capacity to absorb water, which makes overwatering the most common mistake. According to THCFarmer, the root zone should be kept slightly moist, with a relative humidity of 65–75 % in week 1, 60–70 % in week 2 and 55–65 % in week 3.
Watering seedlings
Water in small volumes around the stem, not over the whole surface of the substrate. The root grows towards where it finds moisture, so watering in a small radius encourages it to spread. Lift the pot before and after watering: when it feels light, it’s time to water; when it feels heavy, wait. This technique, known as the “weight rule”, is more reliable than any fixed schedule.

According to MarijuanaSeedsForSale, in large pots, guideline volumes of approximately 500 ml are used for the first few days, increasing gradually as the plant grows. In small starter pots (250 cc–0.5 L), the volumes are much smaller: 30–50 ml per watering is enough in the first few days.
Light progression
GrowWeedEasy confirms that the first three weeks are decisive and recommends a PPFD progression of 100–300 µmol/m²/s during this period. Start at the lower end (100–150 µmol/m²/s) and increase gradually as the plant develops more true leaves. With LED, a distance of 60–80 cm from the canopy usually gives those values at reduced power; always adjust according to the plant’s response.
Pro tip: If the plant is stretching towards the light (long internodes and a thin stem), bring the light source closer or increase its power. If the leaves curl upwards like a taco or white spots appear, move the light away immediately. The plant tells you exactly what it needs.
When to transplant
The criteria for transplanting from the starter pot to the final one are clear:
- Roots poke out of the drainage holes.
- The substrate dries out noticeably faster than in the first few days.
- The plant has 3–4 well-defined nodes.
- The root plug keeps the shape of the container when removed from it.
Note on autoflowering varieties: if you planted in the final pot from the start (which is recommended), this step does not apply. Autoflowering plants are not transplanted.
First transition to the vegetative stage and how to start with nutrients
The transition to the vegetative stage happens naturally between week 3 and week 4, when the plant shows active growth of new nodes and true leaves with the characteristic shape of cannabis. In photoperiod plants, an 18/6 photoperiod keeps the plant in the vegetative stage indefinitely; in autoflowering plants, the transition is automatic and does not depend on light.
According to Modern Farms, the vegetative stage can last between 3 and 8 weeks in photoperiod plants, and that length directly determines the total grow time. A longer vegetative stage produces bigger plants, but it also lengthens the whole cycle.
Starting nutrients: when and how much
If you use a substrate with built-in nutrients (quality soil), you don’t need to add fertilisers during the first 2–3 weeks. The substrate already provides enough. If you use an inert medium such as coco or pure perlite, start the nutrients from the first week, but at low doses: 25–50 % of the manufacturer’s recommended dose is a safe starting point.
Dos and don’ts in the transition to vegetative:
- ✅ Transplant into a 3–7 L pot once the root criteria are met.
- ✅ Water with water adjusted to pH 6,0–7,0 (soil) or 5,8–6,3 (coco) after transplanting.
- ✅ Keep the temperature at 20–28 °C and lower the relative humidity to 50–60 %.
- ✅ Introduce nutrients gradually, watching how the leaves respond.
- ❌ Don’t feed at full strength in the first few weeks: too much nitrogen burns young roots.
- ❌ Don’t transplant autoflowering plants once they have started to grow: the stress reduces the final yield.
- ❌ Do not accidentally switch the photoperiod to 12/12 on photoperiod plants during the vegetative stage.
Autoflowering vs photoperiod: differences that matter in the first few weeks
The most practical difference between the two types is not the flowering cycle, but tolerance to stress in the first few weeks. Autoflowering plants have an internal clock that never stops: from the moment they germinate, the plant moves towards flowering regardless of what you do. This means that any early mistake (overwatering, transplanting, deficiency) reduces the time available to recover and, therefore, the final yield.
According to ZenWeedGuide, autoflowering plants complete their cycle in 8–12 weeks in total, while photoperiod plants need between 14 and 20 weeks depending on the length of the vegetative stage. That difference in time is also a difference in margin for error.
When to choose autoflowering?
Choose autoflowering if your priority is speed, if you have little space or if you grow outdoors with a short season. They are more compact, more discreet and don’t require a photoperiod adjustment. For a first grow, operational simplicity makes up for the lower tolerance to stress.
When to choose photoperiod plants?
Photoperiod plants are the best option if you want to control the size of the plant, if you plan to use training techniques (LST, topping) or if you are after a higher yield per plant. The extra time they offer allows you to correct mistakes and adjust the environment before flowering begins.
To find out more about the advantages of autoflowering plants for beginners, the guide to autoflowering cannabis from Bluedoggenetics covers the key points with practical examples. If you already have an autoflower under way and want to get the most out of it, also take a look at our tips on autoflowering yields.
Which environmental parameters do you need to control indoors and outdoors?
The environment is the factor you can control most easily and the one with the biggest impact in the first few weeks. The target values already appear in the table at the start of this article; here we explain how to measure and adjust them in practice.
Key parameters and measuring tools
| Parameter | Target value (seedling) | Recommended tool |
|---|---|---|
| Temperature | 22–26 °C | Digital thermometer/hygrometer (e.g. Inkbird, SensorPush) |
| Relative humidity | 65–75 % | Digital hygrometer with probe |
| PPFD | 100–200 µmol/m²/s | PPFD meter (e.g. Apogee MQ-500, Dr.Meter) |
| VPD | 0.4–0.8 kPa | Calculated with temperature + RH (apps like VPD Chart) |
| Water pH | 6.0–7.0 (soil) | Digital pH meter (e.g. Bluelab Combo, Milwaukee MW102) |
VPD (vapour pressure deficit) combines temperature and humidity into a single value that indicates how much water stress the plant is experiencing. A VPD of 0.4–0.8 kPa is the safe range for seedlings. If the temperature rises without the humidity rising, the VPD increases and the plant transpires excessively, which stresses young roots.
Indoor: active control
In indoor growing, you have total control over all the parameters. Use an extractor fan with a temperature/humidity controller to maintain the target range. Place the hygrometer at canopy height, not on the wall. To measure PPFD, use a quantum meter or a calibrated smartphone app (such as Photone) as a rough reference.
Outdoors: protection and timing
For outdoor growing, the ideal planting window in central Europe is between late April and early June, when nights consistently stay above 10 °C. Seedlings are sensitive to late frosts and prolonged cold rain. Protect them with a mini greenhouse or plastic tunnel during the first few weeks if the weather is unsettled.
Checklist for setting up and calibrating the environment:
- Place the hygrometer at the height of the plant canopy.
- Check the temperature at the point closest to the heat source (LED light) and at the coldest point of the space.
- Measure the PPFD at the centre of the canopy and at the edges to detect shaded areas.
- Adjust the light distance according to the PPFD reading, not the manufacturer’s generic instructions.
- Calibrate the pH meter with buffer solutions before each use.
Substrates and pots: what to choose for a stress-free start
The substrate is the home of the roots and determines everything else: watering frequency, nutrient availability and aeration. For beginners, there are three main options.
Light soil for seedlings (mild soil): the simplest option. Mixes such as Biobizz Light-Mix or Plagron Lightmix have enough nutrients for the first 2–3 weeks without needing to feed. They are easy to handle and forgive watering mistakes better than coco.
Coco coir: an inert medium derived from coconut fibre. It has excellent aeration and drainage, but requires nutrients from the first watering and a pH adjusted to 5.8–6.3. It is more technical than soil, but allows more precise control of the nutrient programme.
Plugs or germination cubes (Jiffy, Rockwool): ideal for the germination stage and the first few weeks. They are transplanted directly into the final substrate without disturbing the roots. They are the best option if you germinate many seeds at once.
According to Revista THC, the ideal pH for soil substrates is 6–7, and using small starter pots (approximately 250 cc) encourages a compact root system and reduces the risk of overwatering in photoperiod plants.
Pot size guide:
- Germination and seedling (photoperiod): 250 cc–0.5 L.
- Early vegetative (photoperiod): 1–3 L.
- Advanced vegetative stage and flowering: 7–15 L depending on the target size.
- Autoflowering: plant directly in 7–11 L from seed.
Checklist for preparing the medium:
- Moisten the substrate before planting (not soaked, just slightly damp).
- Check the pH of the irrigation water before the first watering.
- Mix in 20–30 % perlite if the substrate doesn’t drain well enough.
- Add mycorrhizal inoculant to the substrate before planting.
- Make sure the pot’s drainage holes are clear.
Watering and feeding: when and how much in the first 3–4 weeks
The most common mistake in the first few weeks is not a lack of nutrients: it is too much water. Most beginners water by the calendar rather than by the plant’s response, and that leads to suffocated roots, slow growth and susceptibility to fungi.
Rule of thumb: lift the pot before watering. If it’s heavy, wait. If it’s light and the surface of the substrate is dry to the touch, water sparingly.
The guideline volumes from MarijuanaSeedsForSale indicate that in large pots, roughly 500 ml is used in the first few days, increasing gradually. In small starter pots, 30–50 ml per watering is enough in the first few days.
Nutrients in the first weeks
If you use soil with built-in nutrients, don’t add fertilisers during the first 2–3 weeks. The substrate already provides what’s needed. If the medium is inert (coco, perlite), start with 25–50 % of the manufacturer’s recommended dose from the first week. Increase gradually according to the visual response of the leaves: an intense, even green indicates that the plant is well fed.
Pro tip: Note down the pH and volume of each watering in a notebook or app. When a problem appears, you’ll have real data to diagnose the cause instead of guessing.
For a detailed guide on watering frequency and signs of overwatering, see the Bluedoggenetics article on watering frequency for cannabis.
Common problems in the first weeks and how to solve them
Most seedling problems have an identifiable root cause. Diagnose before you act.
Quick diagnostic checklist:
- Lift the pot: is it very heavy? Probably overwatering.
- Check the leaves: yellowing from the bottom up? Nitrogen deficiency. Brown spots on the edges? Nutrient burn or incorrect pH.
- Measure the temperature: does it exceed 28 °C? Heat stress.
- Measure the humidity: below 50 % in the seedling stage? Water stress from low RH.
- Check the light: are the leaves curling upwards? Too much light or heat.
Corrective actions for each problem:
- Overwatering: stop watering for 3–5 days, improve drainage and check that the holes in the pot are clear. Don’t add nutrients until the plant recovers.
- Too much light: move the light source further away or reduce the power to 50–60 %. Watch the response over 24 hours.
- Nutrient excess (burn): water with clean water at the correct pH for 2–3 waterings to flush out the excess. Reduce the dose to 25 % when you resume feeding.
- Incorrect pH: adjust the pH of your irrigation water and water with enough volume for some water to come out of the drainage holes (10–15% of the total volume). This corrects the pH of the substrate gradually.
- Premature transplanting: if you’ve already done it, minimise the additional stress. Don’t fertilise, keep relative humidity high (65–70 %) and temporarily reduce the light intensity.
Warning signs that require immediate action:
- Black or brown stem at soil level (fungal damping-off).
- Completely yellow or white leaves in under 48 hours.
- Collapsed plant that doesn’t respond to watering.
- Visible presence of whiteflies, mites or thrips on seedlings.
When these signs appear, act first on the most likely cause (watering, light, temperature) before adding any product. Adding nutrients or pesticides to an already stressed plant usually makes the problem worse.
What practical experience confirms about the first few weeks
The parameters that work are not arbitrary. A temperature of 22–26 °C promotes enzymatic activity in young roots and reduces the proliferation of soil pathogens. Relative humidity of 65–75 % at the seedling stage allows the plant to absorb water mainly through its leaves (stomata) while the root system establishes itself, reducing the demand on still-small roots.
A PPFD of 100–200 µmol/m²/s in the first few weeks isn’t cautious just for the sake of it: it is the range in which photosynthesis is efficient without causing oxidative stress in young tissues. Increasing the intensity before the plant has enough leaf mass doesn’t speed up growth; it only burns the leaves.
According to ZenWeedGuide, starting with 50% of the recommended nutrient dose is standard practice for beginners, and experts agree that early overfeeding is more harmful than underfeeding. A slightly hungry plant can recover in days; a plant with root burn takes weeks.
For autoflowering plants, the practical recommendation is even more conservative: avoid any transplanting, keep watering to a minimum and don’t introduce nutrients until week 2–3. The clock never stops, and every day of stress is a day of flowering lost.
The most useful tool you can have in the first few weeks isn’t a fertiliser or an expensive lamp: it’s a grow journal. Note down temperature, humidity, watering volume and visual observations every day. When something goes wrong, you’ll have data to diagnose the problem instead of guessing.
Practical calendar: week by week during the first 4 weeks
This schedule works as a reference template. Adapt the watering volumes to the actual size of your pot and to your plant’s response.
Option A: autoflowering plants in their final pot
| Day/Week | Main task | Light | Irrigation | Observations |
|---|---|---|---|---|
| Day 1–3 | Germination | Darkness / 18/6 on emergence | Damp substrate | Temperature 22–25 °C |
| Day 4–7 | Open cotyledons | 18/6, PPFD 100–150 | 30–50 ml | Check RH 65–75 % |
| Week 2 | First true leaves | 18/6, PPFD 150–200 | 50–100 ml | Do not fertilise if the substrate already contains nutrients |
| Week 3 | 3–4 nodes, active growth | 18/6, PPFD 200–300 | 100–200 ml | Start nutrients at 25% if using an inert medium |
| Week 4 | Transition to vegetative | 18/6, PPFD 100–300 | 200–300 ml | Increase nutrients to 50% if the response is positive |
How to prevent and control pests and diseases in the first few weeks
Seedlings are especially vulnerable because their immune system is not yet developed and any early attack can be fatal. Prevention is always more effective than treatment.
The most common pests in the first few weeks are fungus gnats (substrate flies), red mites and thrips. Fungus gnats appear when the substrate is too damp: their larvae attack young roots and can destroy a seedling in a few days. The most direct solution is to let the substrate dry out properly between waterings and cover the surface with a layer of perlite or quartz sand, which stops the adults from laying eggs.
To deal with red spider mites, prevention means keeping relative humidity above 50 % and ensuring good air circulation. If you spot small white or yellow dots on the leaves with fine webbing on the undersides, act straight away with diluted neem oil (2–3 ml per litre of water) or potassium soap. Apply it when the light is at its lowest to avoid burns.
The most common fungal diseases in seedlings are damping-off (stem rot) and powdery mildew. Damping-off appears when humidity is high, ventilation is poor and the substrate is waterlogged. There is no cure once it appears; prevention is the only strategy. Powdery mildew, on the other hand, can be treated with diluted bicarbonate of soda (5 g per litre) or with sulphur-based products if caught in time.
Weekly inspection protocol:
- Check the undersides of the leaves with a 30x magnifier to spot mites or eggs.
- Check the surface of the substrate: if there are small gnats flying around, you have fungus gnats.
- Check the stem collar: if it is dark or soft, there is a risk of damping-off.
- Check that there are no white powdery spots on the leaves (mildew).
Ventilation and air circulation to prevent mould and strengthen plants
Ventilation serves two functions that many beginners underestimate: it removes the damp, stagnant air that encourages mould, and it creates mechanical resistance that strengthens the stem. A seedling grown in a gentle breeze develops a thicker, sturdier stem than one in still air, because the plant produces more support tissue in response to movement.

Indoors, the basic setup consists of an extractor fan that renews the air in the space every 1–3 minutes and an internal circulation fan that moves the air gently without pointing directly at the seedlings. Direct, intense airflow on small seedlings dehydrates and stresses them; the aim is a breeze that makes the leaves tremble slightly, not bend them over.
Temperature and relative humidity are inseparable from ventilation. If RH is constantly above 75% for seedlings, the risk of botrytis and powdery mildew increases. An extractor fan with a humidity controller that switches on extraction when RH exceeds the target threshold is the most practical solution for small growing spaces.
Outdoors, natural ventilation is usually enough, but seedlings in a greenhouse or tunnel need active ventilation on hot days. Open the ends of the tunnel during the hottest hours and close them at night to keep the warmth in.
Rule of thumb: if you can smell the cannabis from outside the growing space, the extraction is insufficient. An activated carbon filter connected to the extractor fan solves the odour problem and confirms that the airflow is adequate.
In short:
- Environmental parameters: keep 22–26 °C and 65–75 % RH during the seedling stage; gradually increase the PPFD from 100 to 300 µmol/m²/s.
- Watering by weight: Lift the pot before watering; water only when it feels light and the surface substrate is dry.
- Water pH: Adjust to 6.0–7.0 in soil and 5.8–6.3 in coco; incorrect pH blocks nutrients even when they are present.
- Autoflowering plants without transplanting: Plant autoflowering seeds directly in their final 7–11 L pot to avoid irreversible stress.
- Bluedoggenetics: Offers autoflowering and feminised seeds with a quality guarantee and discreet shipping, ideal for beginners.
What nobody tells you about the first weeks of growing
There is a trap that almost every beginner falls into: confusing activity with progress. Watering more, feeding earlier, moving the light closer, transplanting early. The logic seems right: more attention should produce better results. But in the first few weeks, the plant doesn’t need more intervention; it needs stability.
A seedling’s root system is microscopic during the first few days. It can’t absorb large volumes of water or process nutrients in quantity. Every time you intervene too much, you interrupt a process that the plant is already carrying out correctly on its own. Patience is not passivity: it’s the skill of observing without acting until the plant genuinely needs it.
What really makes the difference is record-keeping. A grower who notes down the temperature, humidity, watering volume and appearance of the leaves every day has a huge advantage over one who grows “by eye”. When something goes wrong, the data tells you exactly where to look. Without data, you can only guess.
Another point that is underestimated: genetics matter more than they seem in the first weeks. A quality seed from a reputable seed bank germinates more consistently, develops roots faster and tolerates environmental variations better than a seed of unknown origin. It’s not marketing: it’s biology. Investing in quality seeds gives the best return on a first grow.
The seeds to get off to a good start from day one
If you’ve made it this far, you already have the plan. The next step is choosing the right seed to carry it out. Bluedoggenetics brings together autoflowering and feminised varieties selected specifically for their genetic stability, ease of growing and stress resistance, which is exactly what you need in the first few weeks.
For a first indoor grow, the autoflowering seeds in the Bluedoggenetics catalogue are the most straightforward option: 8–12 week cycles, no photoperiod adjustments and the genetic consistency that makes the difference between a successful germination and a wasted week. For those who prefer photoperiod plants with more control over size, the selection of premium feminised seeds covers everything from compact varieties to high-yielding genetics.
Shipping is discreet, order tracking is in real time and our team’s support is available if you have any questions before or after your purchase. Browse the full catalogue and choose the variety that best suits your space and goals at Bluedoggenetics. If you already know what you want, you can add it straight to your basket and have it on its way within a few hours.
Useful sources and recommended reading
The following sources support the recommendations in this guide and are useful for expanding on or verifying any point:
- Cannabis seedling: avoid stunted growth — GrowithJane: temperature, RH, PPFD and photoperiod parameters for seedlings.
- Seedlings: how to look after the first stage — Revista THC: use of root promoters, small pots and substrate pH.
- The first 3 weeks decide everything — GrowWeedEasy: progressive watering schedule and PPFD recommendations.
- Cannabis seedling care: the first three weeks — THCFarmer: RH ranges by week and transplanting criteria.
- Cannabis plant growth stages — ZenWeedGuide: differences between autoflowering and photoperiod plants and cycle lengths.
- Beginner cannabis growing guide — ZenWeedGuide: pH by medium and recommended starting nutrient doses.
- The complete week-by-week cannabis grow guide — Modern Farms: week-by-week calendar from germination to harvest.
- Cannabis seedling stage: day-by-day growth guide — MarijuanaSeedsForSale: a day-by-day breakdown with approximate watering volumes.
Recommended practical tools:
For further questions about varieties, germination or growing, the Bluedoggenetics team is available through the shop at bluedoggenetics.com.
This article is for general informational purposes. The legal conditions for growing cannabis vary by country and region. Check the regulations in force in your jurisdiction before growing.
Suggested slug: first-weeks-cannabis-grow