

For your first grow, consider autoflowering or feminised seeds: they can simplify management, and feminised seeds reduce the risk of ending up with male plants. Here we explain how to choose between them, how to germinate them without damaging the radicle and what to do during the first weeks of your plant’s life.
In short:
- Autoflowering plants need fewer lighting adjustments and shorten the wait, but they leave less room to correct mistakes; photoperiod plants require you to control the light cycle.
- Before buying, ask about the batch, the date, the origin and the guarantee, and check what germination percentage the seller can prove.
- To avoid damaging the radicle, germinate directly in moist, light substrate; with paper you need to watch the humidity and move the root carefully.
- During the first few weeks, water sparingly once the top layer dries out, give gentle light and change only one variable when you see signs of stress.
What type of seed suits a first grow?
Before opening any pack, it’s worth understanding the three families you’re going to come across. The choice depends on your space, how long you want to wait and what you’re looking for in the harvest.
- Autoflowering plants: they switch to flowering by age, not by hours of light. Their cycle depends on the variety and they usually need fewer light adjustments, which is useful while you’re still learning.
- Photoperiod feminised: they need you to change the photoperiod to flower. In return, they let you control the size and structure of the plant by adjusting the photoperiod.
- Regular: they can turn out male or female, so they require sexing the plants. For a first grow they add a complication you don’t need.
The practical comparison between autos and photoperiod plants is this: autoflowering saves you decisions and shortens the wait, but leaves less room to correct growth mistakes. Photoperiod gives you more control, but forces you to manage the light carefully. If you want to find out more about the advantages of the former, we have our guide to autoflowering for beginners.
One detail that often gets overlooked is genetic stability. A genetically stable seed produces plants that are similar to one another and predictable, and that makes your first experience far less frustrating. A European genotyping study of commercial seeds found problems with labelling accuracy and genetic variability, so it’s worth checking the supplier’s information. Hemp varieties show something similar in the field: adaptation and photoperiod vary from one variety to another, which is why choosing well from the start matters so much.
In short, for beginners, autoflowering is the shortest and calmest route, and a stable feminised variety is the best option if you prefer more control and already know how to manage light.
Checklist for choosing your seeds before you buy
You don’t need to be an expert to buy well. It’s enough to check a few points before paying.
- Germination information: check whether the seller provides data and explains how they back it up. If you can’t find any information, ask before buying.
- Batch and date: the most recent, well-stored seeds germinate better. Ask about the batch if the product page doesn’t say.
- Origin and phenotypic description: look for clear information about the originating seed bank, the expected size and the cycle of the variety.
- Guarantee: check that there is a written quality guarantee policy.
- Discreet shipping and tracking: choose shops that let you track your order and take care to keep the package discreet.
- Varieties suited to beginners: start with short cycles and genetics described as easy. You’ll have time to move on to something more demanding later.
There are only a few specific questions to ask the seller: which batch is this variety from? What germination percentage do they guarantee? What happens if a seed doesn’t germinate? A vague or evasive answer is a warning sign, just like an absurdly low price on a renowned genetic line.
Bear in mind that viability isn’t the same in all seeds. Trials with hemp varieties showed that viability and germination response change depending on the variety and origin, and that pretreatments did not consistently increase germination. In other words: there’s no trick that replaces a good starting seed.
Pro tip: for your first grow, choose a variety that suits your space and your experience, rather than complicating things with several different genetics.
If you would like to see more examples of what to look for, our guide to seeds for beginners expands on this list.
How to germinate your seeds step by step without damaging the radicle
Germination is the moment when most beginners lose seeds, almost always through too much handling. The principle is simple: gentle warmth, constant moisture, darkness and plenty of patience.
Basic materials:
- Disinfected seeds and tweezers
- Kitchen paper or clean napkins
- Two plates, or a container with a lid
- Light, airy substrate, or rooting plugs
- A warm, dark place with a stable temperature
Kitchen paper method
It’s the most popular because it lets you see when the root emerges.
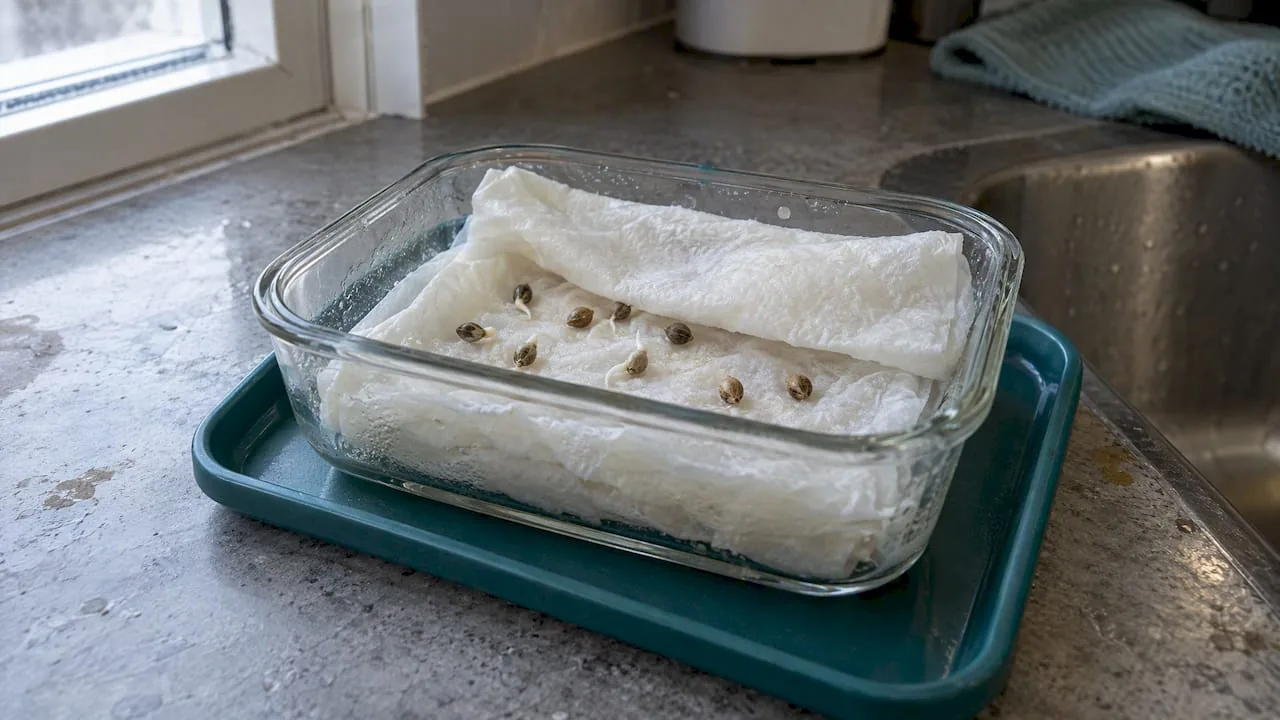
- Moisten the paper without soaking it: it should be damp, never waterlogged.
- Place the seeds apart between two layers of paper and put them between two plates.
- Leave them in a warm, dark place and check the moisture every day.
- When the root measures a couple of centimetres, carefully move them to the substrate, root facing down.
If the seed shows no changes, avoid digging it up every few minutes and give it more time.
Straight into substrate
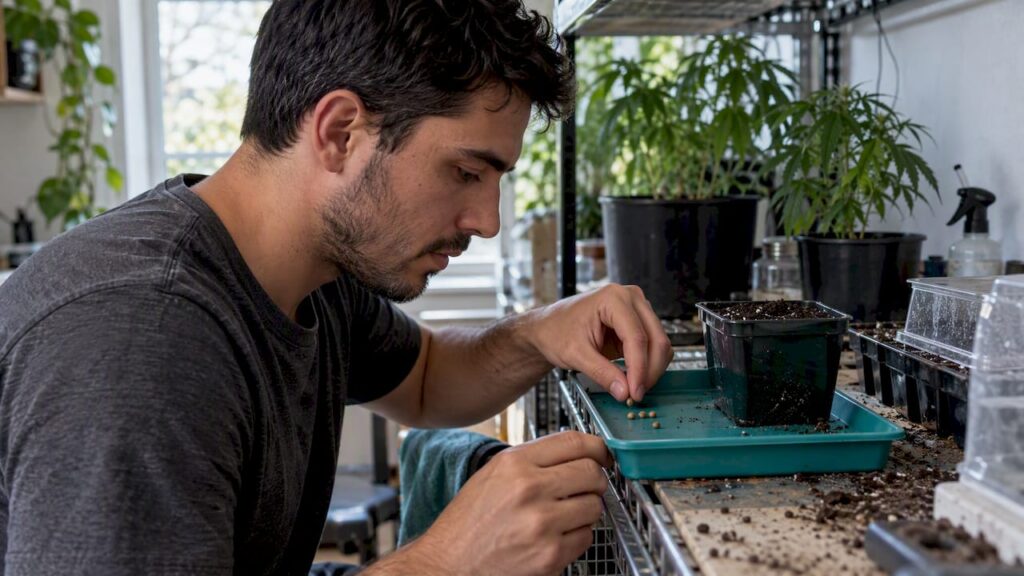
It’s the simplest method and the one with the least risk to the root, because you never touch it. Make a hole a little over a centimetre deep in a light, moist substrate, place the seed in it and cover it without pressing down. Keep the moisture steady and wait. The Soft Secrets indoor growing guide describes these methods and the care needed to avoid damaging the radicle.

With rooting plugs
Plugs are peat or fibre cubes that retain moisture and are transplanted whole. They are a good choice if you want to control humidity without overthinking it and avoid handling the seedling when transplanting.
These are the hygiene and handling rules that work best:
- Wash your hands and disinfect the tweezers before touching a seed.
- Never touch the radicle with your fingers: use tweezers, and only if absolutely necessary.
- Don’t let the paper dry out or become waterlogged.
- Avoid moving the seeds again and again to check on them.
Pro tip: if a seed is slow to open, resist the temptation to dig it up to check; every time you move it, you increase the risk of breaking the root.
For a more detailed walkthrough, you have our practical step-by-step germination guide and the complete guide to germinating seeds.
What should you do during the seedling’s first few weeks?
The early seedling stages influence how the plant gets going. The golden rule is to do little, but do it well.
- Watering: a seedling needs less water than you might imagine. Water sparingly and in circles, away from the stem, and wait for the top layer of the substrate to dry out before the next watering. Overwatering is the number one cause of problems at the start.
- Light: give soft, constant light, without bringing the lamp too close. Autoflowering plants don’t depend on a change in photoperiod to start flowering, whereas photoperiod-dependent ones need the light adjusted to induce it.
- Transplanting: move the plant to its final pot when the roots are starting to show and the root ball holds together. With autoflowering plants it’s best to avoid late transplants, because the stress costs them growing time. Do it carefully and with the substrate slightly moist.
- Signs of a healthy seedling: evenly green leaves, a firm stem and visible growth. If you see yellowish leaves, burnt tips or a long, weak stem, check the watering and the distance from the light first before changing anything else.
At any sign of stress, change only one variable at a time. If you change watering, light and substrate all at once, you will never know what fixed the problem. To expand on this stage, take a look at our guide to the first weeks of growing, covering watering, transplanting and signs of health.
What I would most have liked to know in my first grow
My most valuable piece of advice is a boring one: be patient and don’t touch what is working. Almost all the beginner failures I have seen come from wanting to check, move or correct too much, especially during germination. My recommendation is to choose an autoflowering variety suited to your space, use a light substrate and germinate directly in it to avoid handling the root. That way you learn the whole cycle without adding complications, and you will do your second grow with much more confidence.
Where to buy reliable seeds for your first grow
If you want to get off to a good start, at Bluedog Genetics you’ll find a selection of varieties and shipping options. Check the purchase conditions and guarantees before choosing. For a first grow we recommend two categories: autoflowering seeds, designed for those who want simplicity and speed, and feminised seeds, ideal if you prefer more control over the plant. Head in, compare product pages and choose the one that best suits your space.

Frequently Asked Questions
Which seeds can germinate?
Seeds that are mature, well stored and of healthy genetics will germinate, usually dark in colour with a firm shell. Pale, soft or damaged seeds are usually unviable. Even with seeds in good condition, germination can vary, so bear that uncertainty in mind when planning.
What is the difference between an F1 and an F2 seed?
In general, F1 designates the first generation of a cross and F2 a later generation. Uniformity and variation depend on the parental genetics and the breeding method. For a beginner, the uniformity of a stable F1 makes the first grow easier.
What’s the difference between regular and feminised seeds?
Regular seeds can produce male or female plants, so you need to identify and remove the males. Feminised seeds are selected to produce females, which makes growing simpler. That’s why we recommend them to beginners.
How long do seeds take to germinate?
Some seeds take longer, so it’s worth waiting before giving up on them. Keep warmth and humidity stable, and avoid moving them.
Sources
- Genotyping of Commercial European Cannabis Seeds Based on Multiple Mapped Marker Loci: A Comparative Study of Drug and Hemp Varieties
- Seed selection and germination in indoor growing
- Phenological Development and Growth Responses of Industrial Hemp (Cannabis sativa L.) to Sowing Dates and Climatic Conditions in Elvas, Portugal