

For anyone starting to grow at home, the safest option is a feminised autoflowering variety if you want simplicity and speed, or a feminised photoperiod variety if you prefer more control and a bigger final harvest. Both remove the risk of male plants, and with the basic rules of watering, light and ventilation you’ll see below, your first cycle can go well first time.
In short:
- Feminised autoflowering seeds are the simplest and quickest option for beginners, completing their cycle in 8 to 12 weeks from germination.
- It is essential to adjust light, watering and ventilation correctly to avoid common mistakes such as excess nutrients, poor ventilation or plants that are too dense.
- Germination is easily done with the damp paper method in 24 to 72 hours, transplanting when the root is between 0.5 and 1 cm long.
- For your first grow, we recommend light soil with good drainage and small pots that you later transplant into larger ones, adjusting the lighting to each stage.
- Buying seeds from a reliable seed bank, with documented genetic information and discreet shipping conditions, reduces the risk of problems later in the grow.
Types of seeds for indoor beginners: autos, photoperiods and feminised
The most important decision before you touch any soil is what type of seed you are going to plant, because it shapes everything else: how long it will take, how much room for error you have and how much you need to control the light.
Autoflowering plants go from vegetative growth to flowering by age, not by hours of light, so you never need to change the photoperiod. They usually complete their cycle in 8 to 12 weeks from germination, which makes them the fastest route to results. The downside is that their vegetative phase is short, so there is less room to correct a watering or nutrient mistake before they enter flowering.
Photoperiod plants depend on the light cycle you set for them: they move into flowering when you reduce the hours of light to 12/12. This gives you total control over how long you keep the plant in the vegetative stage, and they normally offer a higher final yield, but they require you to keep a close eye on the light schedule.
The term feminised doesn’t describe a growth cycle but the genetics: the seed has been developed to produce only female plants, removing the risk of males appearing and ruining your harvest through pollination. You can find feminised varieties that are either autoflowering or photoperiod.
For a first grow, the safest combination is usually:
- Feminised autoflowering: less photoperiod management and a short cycle, ideal if you want quick results without bothering with light timers.
- Feminised photoperiod: more control over the size of the plant and greater harvest potential, suitable if you have a little more patience.
- Regular (not feminised): only advisable if you already have experience identifying male plants, because it involves more supervision.
If you want to look more closely at the specific advantages of autoflowering plants before deciding, this guide to autoflowering cannabis breaks down the cases where they really pay off.
How to germinate cannabis seeds at home: step-by-step method
Germination is the moment when people lose the most nerve unnecessarily. The classic damp paper method works well because it lets you see the root emerging without handling the seed too much.
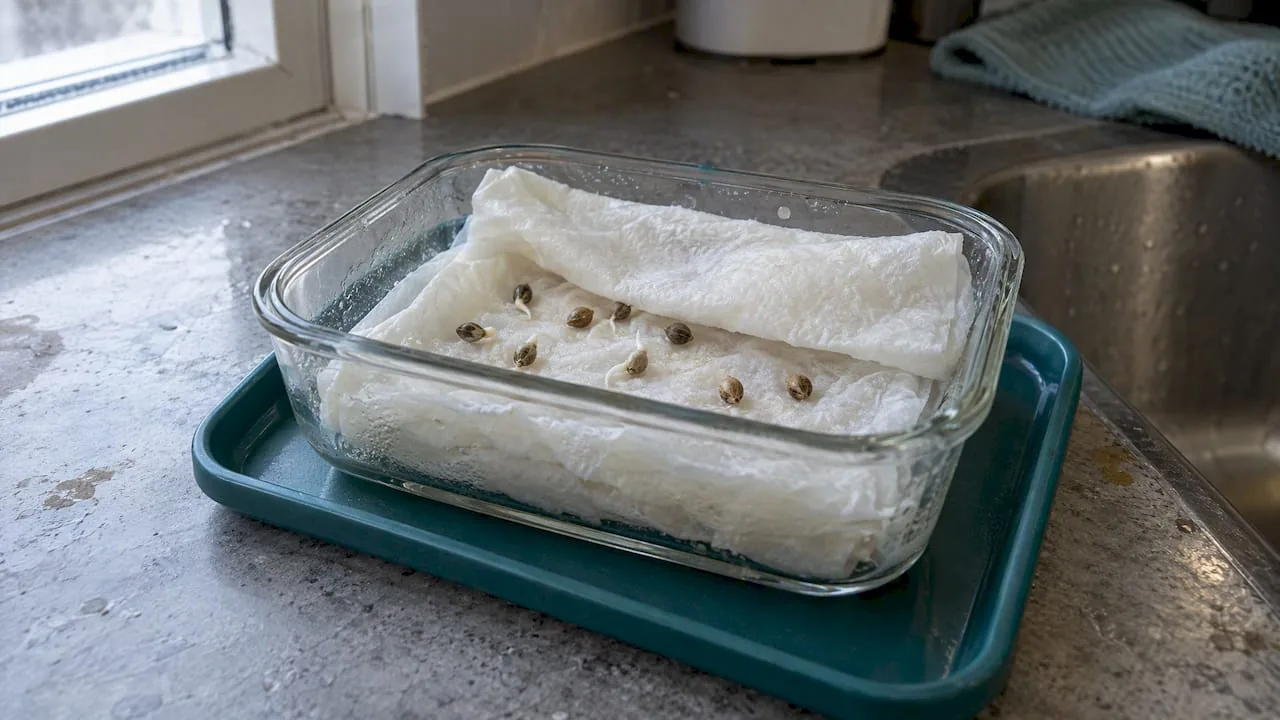
- Prepare two plates with damp (not soaking) paper towel and place the seeds between both layers, in a dark place at room temperature.
- Keep the temperature between 20 and 25 °C. Below that range germination slows down a lot; above it, the paper dries out too quickly.
- Check every 12 hours and add water if the paper starts to dry out, never leaving puddles.
- Wait until the root is between 0.5 and 1 cm long, usually 24 to 72 hours depending on the variety, and transplant it straight into its final container with the root pointing down.
- Cover with 1 cm of substrate and keep humidity high for the first 48 hours without waterlogging.
You can also use jiffys (compressed peat pellets) or a propagator with a transparent lid, which keeps the humidity constant without you having to check the paper every few hours. The vegetative stage usually starts with light cycles of 18 hours of light and 6 of darkness, and that is when it is worth consulting a complete germination guide so you don’t go wrong at transplanting.
Avoid the most common mistake at this stage: transplanting too late, when the root has already become tangled in the paper. That stresses the seedling at its most fragile moment.
Which substrate and pot to use for indoor growing
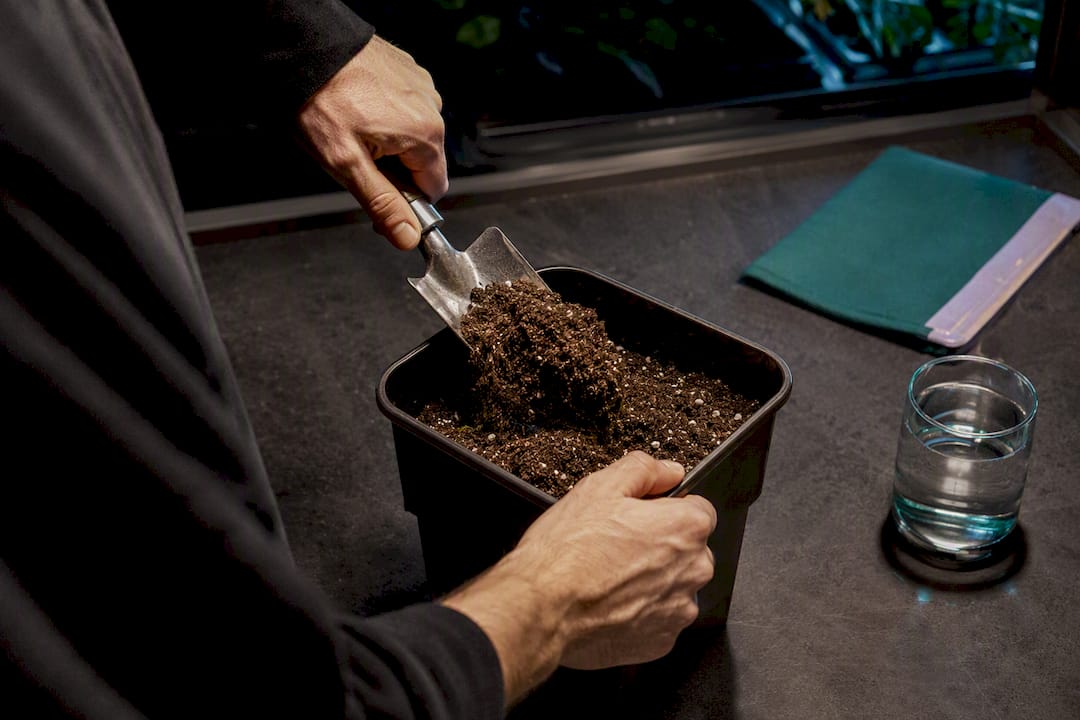
Soil is the most sensible option for your first grow, and that’s not a textbook oversimplification: no substrate is universally superior, but soil offers a greater buffer against mistakes with watering or nutrients, something you’ll appreciate in your first cycle.
Light organic mixes with good drainage (perlite or coco fibre in a small proportion) work better than compact garden soil. Pure coco and hydroponics offer faster growth, but they demand constant fertilising and much stricter pH control: they are systems with no margin for error, and that margin is exactly what you need when you are starting out.
About the pots:
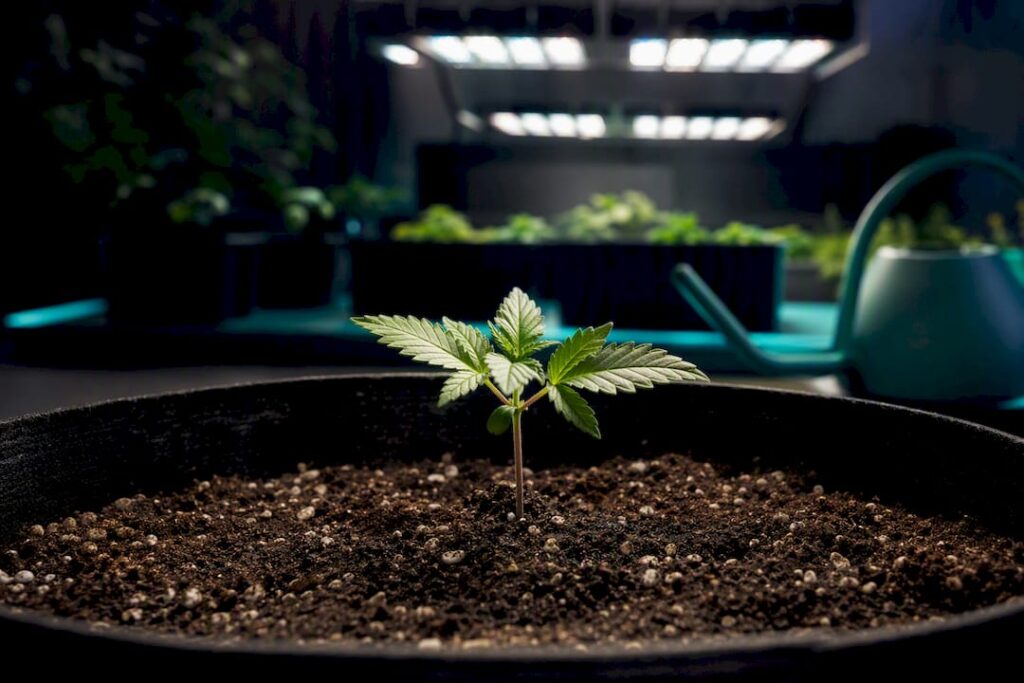
- Start in a small container (1 to 3 litres) for the seedling and transplant into its final 7 to 15 litre pot when the roots fill the root ball.
- Fabric pots (textile) improve root oxygenation and reduce the risk of waterlogging compared with plastic ones.
- Always transplant late in the day or with the lights off, to reduce stress from heat and direct light.
Pro tip: If you’re unsure when to transplant, take the plant out of its small pot and look at the roots: if they already wrap around the whole root ball in a spiral, it’s time. Waiting too long slows growth more than transplanting “too early”.
What light you need for seedling, vegetative and flowering
Lighting is where beginners waste the most money. You don’t need the most expensive lamp, you need the right one for your space.
- T5 (fluorescent): inexpensive and low in heat, ideal only for the seedling or cutting stage; it falls short in flowering.
- Full-spectrum LED: the most balanced option for a small grow tent, with good yield per watt and less heat than HPS.
- HPS (high-pressure sodium): large flower yield, but it generates a lot of heat and demands better ventilation, which complicates a first grow.
For a small grow tent or room, allow between 30 and 50 W of real LED power per square metre in the vegetative stage, rising to 60-70 W/m² in flowering. Place the lamp about 40-50 cm from the plants in the vegetative stage and gradually bring it closer to 25-30 cm in flowering, always checking that the upper leaves do not burn.
The standard cycle is 18 hours of light and 6 of darkness during the vegetative stage, and 12/12 when you force flowering in photoperiod varieties. Autoflowering plants are the exception: you can keep them on 18/6 or even 20/4 throughout their whole cycle, because their flowering depends on age rather than photoperiod. If you are setting up your space from scratch, this guide to setting up your grow room covers the complete installation of lights and structure.
How much ventilation a small grow tent needs
Stagnant air is responsible for more problems than it seems: built-up heat, excess humidity and the perfect breeding ground for mould. A properly sized extractor together with circulation fans solves most of these problems before they appear.
The ranges to monitor for each stage:
- Seedling: 20-25 °C and high relative humidity, close to 70 %.
- Vegetative: 22-28 °C and humidity between 50-60 %.
- Flowering: 20-26 °C and humidity dropping to 40-50 %, to prevent mould in the denser flowers.
An extractor fan with a carbon filter and a small oscillating fan are usually enough for a tent with 1 to 4 plants. A thermo-hygrometer costing a few euros, placed at canopy height, tells you in seconds whether you need to increase extraction or open an air intake. If humidity stays above the range for its stage for several hours in a row, act that same night: don’t wait until the next day.
When and how to water without drowning the plant
Overwatering is, by a long way, the mistake that kills the most plants in a first grow. The most reliable rule is simple: go by the weight of the pot and let the top 2 or 3 centimetres of substrate dry out before watering again.
On pH, memorise two ranges:
- In soil: keep the irrigation water between pH 6.3 and 6.8.
- In coco or hydroponics: lower the range to 5.8-6.2, because these substrates don’t buffer pH the way soil does.
An affordable digital pH meter is one of the best investments you can make before your first watering with nutrients.
When it comes to fertilisers, always start with 25-50 % of the dose the manufacturer recommends on the packaging, and only increase it if the plant looks healthy after a week. A nutrient burn from overfeeding takes weeks to recover from; a mild deficiency can be corrected in days.
Pro tip: Lift the pot before and after watering during the first week to memorise the difference in weight. After two or three waterings you’ll know exactly when to water without needing to look at the substrate.
How long an indoor grow takes from start to finish
Planning a calendar saves you the frustration of not knowing whether your plant is “running slow” or simply following its normal pace.
| Stage | Autoflowering | Photoperiod |
|---|---|---|
| Germination | 1-5 days | 1-5 days |
| Seedling | 1-3 weeks | 1-3 weeks |
| Vegetative | 3-5 weeks | 4-8 weeks (adjustable) |
| Flowering | 5-8 weeks | 8 to 12 weeks |
| Approximate total | 8-12 weeks | 14-20 weeks |
For a first attempt, grow between 1 and 3 plants, never more. Fewer plants means more attention per plant and less chance of a problem going unnoticed until it’s too late.
Beginner mistakes that ruin your first harvest
Almost all first-grow failures come down to the same causes, and almost all of them can be avoided by knowing what to look for.
- Watering by the calendar instead of by need. It causes drowned roots and drooping, yellowing leaves. Solution: go back to the pot weight rule.
- Overdoing the nutrients from the first watering. It burns the leaf tips and halts growth. Solution: always start with reduced doses and increase gradually.
- Ignoring ventilation until mould appears. Stagnant air with high humidity is the perfect combination for fungi during flowering. Solution: install the extractor before planting, not after the problem appears.
- Placing the lamp too close or too far away. It burns the upper leaves or, conversely, stretches the plant in search of light. Solution: follow the distances for each stage given above and adjust according to the plant’s reaction.
- Growing too many plants for the available space. It creates competition for light and air, and makes it harder to spot problems in time. Solution: fewer plants, more attention.
- Buying seeds without verifiable genetic information. It increases the risk of hermaphrodite plants or uneven germination. Solution: always buy from a seed bank that documents its genetics and offers guarantees.
Almost all of these mistakes share a common root: treating each variable (light, watering, pH, air) separately instead of as a system whose parts affect one another. Correcting one without looking at the others rarely solves the problem completely.
What to check before buying your first seeds online
Before paying, check that the product page includes verifiable information, not just pretty photos of the finished flower.
- Documented genetics: the name of the parent varieties and the seed bank of origin, not just a generic commercial name.
- Germination rate stated or guaranteed by the seller, and what the shop does if any seed fails to germinate.
- Confirmed type: feminised, autoflowering or regular, with no ambiguity in the description.
- Discreet shipping conditions and real delivery times, not vague estimates.
- Accessible customer service to answer questions before and after purchase.
Buying seeds without a clear origin is, according to experienced growers themselves, one of the most frequent causes of problematic or hermaphrodite plants in home growing. If you also want to strengthen the practical side before your first watering with nutrients, this guide to the first weeks of growing answers the most common questions of that stage.
Author’s perspective
What most often goes wrong in a first grow is not a single isolated variable, but the idea that you can improvise on a couple of aspects and make up for it with the others. Badly calculated light leads to poor watering, and poorly calculated watering leads to overfeeding to “fix” it. Every real mistake I have seen documented starts from that chain, never from a one-off failure. The practical solution is always the same: fewer plants, fewer loose variables and more daily observation. If you have specific questions about germination or transplanting, the internal guides mentioned above answer almost everything a first cycle throws up.
Why Bluedog Genetics is a good starting point for your first grow
A curated selection of exclusive varieties can be a good option for those growing for the first time or with experience. If, after reading this guide, you decide on the quick route without photoperiod complications, autoflowering seeds are the option most consistent with what has been explained. If you prefer more control over the final size of the plant and higher yield, feminised seeds give you that margin without the risk of male plants. In both cases, it’s important that shipping is discreet and that there is an order tracking system, along with customer support that answers questions before and after purchase. Head to the shop, check the genetic profile of the variety that interests you and choose the one that best suits the space and time you have available.
Sources
To go deeper into germination and light cycles, the El Planteo guide explains the process step by step. On watering and nutrient mistakes, HydroParadise covers the most common failures in first grows. To understand substrates, Cannabivo compares soil, coco and hydroponics on a scientific basis.
- Indoor cannabis growing: a beginner’s guide – El Planteo
- 5 mistakes that ruin a first indoor grow – HydroParadise
- Growing cannabis indoors: a science-based guide – Cannabivo
- Maryjane
Frequently Asked Questions
What is the easiest seed to plant for beginners?
A feminised autoflowering plant is the simplest option: it doesn’t depend on the photoperiod, copes better with light schedule mistakes and completes its cycle in a few weeks.
Which seed is the fastest to germinate?
With the damp paper towel method, most cannabis seeds show a root within 24 to 72 hours, regardless of whether they are autoflowering or photoperiod.
Do I need expensive equipment to start growing indoors?
No. A full-spectrum LED, an extractor fan with a carbon filter and a basic thermo-hygrometer cover the needs of a first grow of 1 to 3 plants.
How long does an autoflowering plant take to be ready for harvest?
Between 8 and 12 weeks from germination, compared with the 14-20 weeks of a photoperiod plant, depending on how long you keep the vegetative stage going.
Where can I buy seeds with real guarantees?
Bluedog Genetics offers feminised and autoflowering seeds with verifiable genetic information, discreet shipping and personalised support throughout the whole purchasing process.